
With Stripe’s Payment Link system you can quickly create a page for customers to safely provide their contact details and purchase. This could be used for selling tickets to a one-off event (with a fixed value), gift vouchers, or even for recurring subscription payments. As the name suggests, you provide a specific link to your customer which relates to a certain product. They go to that page, hosted on Stripe’s secure servers, and enter their details.
Customer’s can even pay via Apple Pay or Google Pay, making it a super quick way to checkout. Not only that, Stripe’s clear pricing model of 1.4% + 20p a transaction with no monthly fees makes it very competitive.
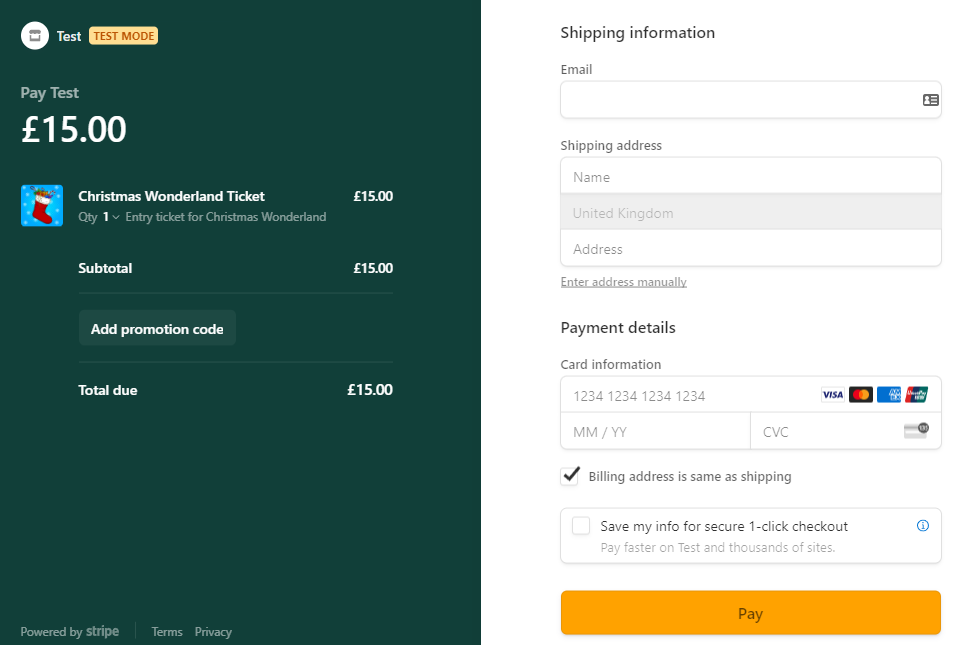
We’ve created a demo Stripe Payment Link example here, with the majority of features enabled. Note that the system doesn’t work like a shopping basket, you can only buy the product the link has been created for, so its not a substitute for an e-commerce store.
Getting Set Up
Firstly, go to stripe.com and register for an account if you haven’t got one already. At this point you can choose to use the ‘test mode’ to see if this solution will work for you, or if you’re happy to dive in select Activate Account.
Go to the Payments section of the Dashboard, and select Payment Links in the left hand navigation.
Select New from the top right to create your first link.
Product Setup
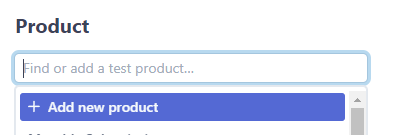
You’ll need to create a new “Product” to sell. This could be for a service or subscription you offer, or for a physical product. Click into the “Find or add a product” box then “Add a Product”.
In the popup complete the name of the product and the price. You can select either a One Time price, or one that’s recurring. Within the recurring options you can set the frequency of the recurrence, from daily up to yearly. Set up the pricing carefully as once you’ve created it you will be unable to edit it.
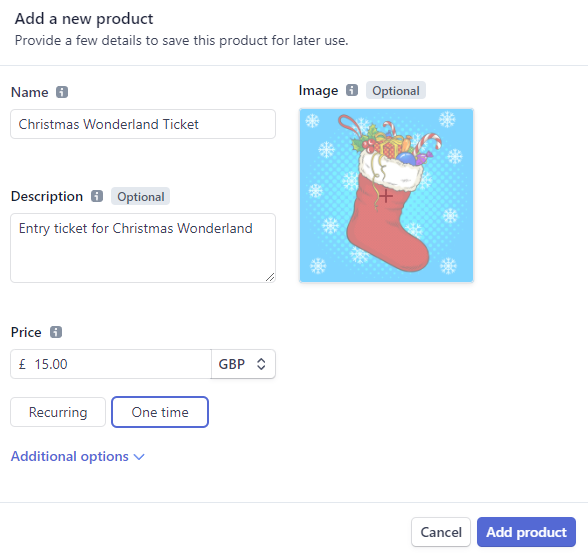
If you wish, upload an optional photo, this will show on the payment page so can be a visual clue to a customer they are purchasing the correct time. Images should be a jpg or PNG file smaller than 2mb.
Select Add Product to create the product.
Payment Page Settings
Once you’ve created your product you’ll see a preview of the payment page on the right hand side.
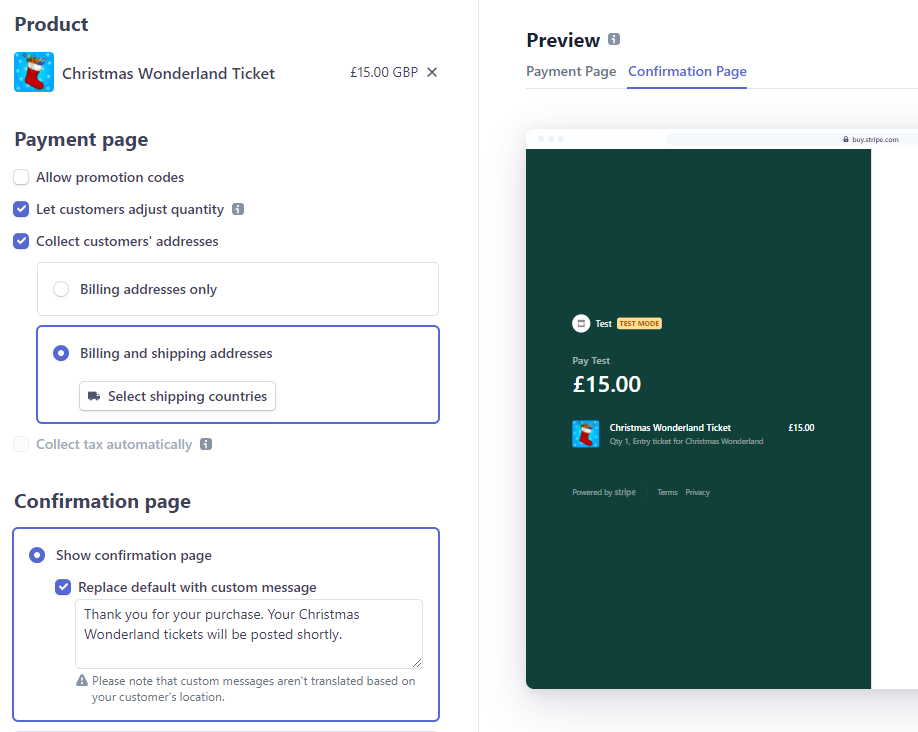
There are a variety of settings you can customise for your payment link:
Use of promotion codes – Enabling this allows customers to use discount coupons. Coupons can be created as either a percentage discount, or a fixed value amount, and can be limited to a set period of time or total number of times it can be redeemed. These are created on the main Stripe dashboard under Products : Coupons.
Adjust the quantity they can purchase – This allows a user to purchase multiple of the product you are offering.
Collect customer’s addresses – Allows a customer to provide a billing and shipping address. If you select Shipping you can select which countries you wish to ship to.
Collect tax automatically – You’ll have to do a bit more configuration to get this working, detailing your business details and item origins, but once done it’ll auto calculate tax rates.
Confirmation Page – You can either show the default Stripe confirmation page with a custom message, or redirect users to a page on your own website. You can toggle the preview of this at the top right.
Once you’re happy with you page click the Create Link button at the top right. You’ll be presented with an overview of what you’ve just set, and the all important link button at the top, so you can view your new page.
Styling Your Page
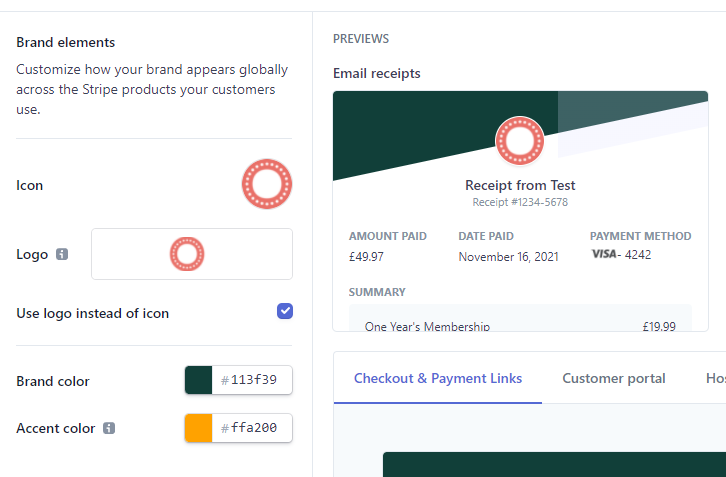
You will likely want your page styled to match your brand, although the default styling is usable out of the box. To style your page go to the Cog icon at the top right, and select Branding. In here you can assign a logo, and brand and accent colours. These will then be applied to your payment page and email receipts.
That’s it! Copy the link you created earlier and share it via email or on social media posts.
Taking It Further
It’s great that you’ve been able to take a payment, but most companies will want to do something more with the data once an order has been place. Stripe integrates with Zapier, a hugely flexible system that links different platforms together.
A popular integration is Google Sheets, so any order placed will appear as a new row. This means you can add additional information to them, such as tracking order status or delivery tracking codes.
For further information on linking Zapier to Stripe see their help page.